

Homebrewing 101 – Your First Brew & Ingredients
This is part 2 of an ongoing series on homebrewing. For part one on equipment & pre-brewing prep, please go here.
Now that you have the right equipment, you need some ingredients for your first batch. If you are reading this article, you most likely know the four main ingredients in beer: Grains, Hops, Water, & Yeast. Quite simple, but within each of these categories there are a lot of options. While you might be intimidated by all of the selections, your first batch should be a simple one. I know you are probably excited to make the most amazing vanilla caramel mocha latte milk stout, complete with all sorts of fancy spices and ingredients, but that is not the way to start. You can’t be a five star chef without learning the ropes along the way, and the same can be said about being a brewer.
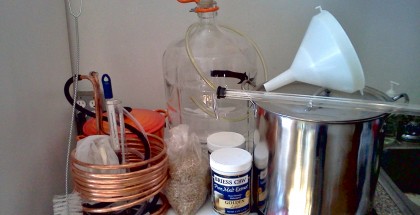
As I have advocated before, anyone who can boil water can brew beer if they can follow instructions and have some patience. With that, I suggest that anyone attempting home brewing for the first time use a kit. They are pretty simple and do not have a lot of room for error. You also should have a decent selection to make almost any style you like – from wits to porters to pale ales and IPAs. The kits will likely be pre-packaged with everything you need. Lets take a look at each of the ingredients that you are likely to use.
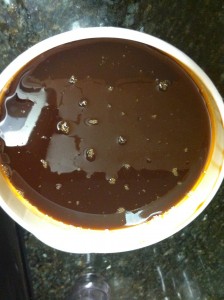 Malt – Malt is the sugary goodness that is produced after the mashing of grains (the process of converting starches in grain to fermentable sugars in all-grain brewing). Buying powdered or liquified malt allows you to skip the mashing process, which, frankly, adds more room for error and is something you should jump into when you are confident that you have the basics down. Malt is available in powdered and liquified form and can come from all sorts of grains. Powdered malt looks like regular sugar and will come in a bag, while liquified malt looks like and is the consistency of honey or molasses and will come in a small bucket-like container (probably five pounds or so of it). What type of beer you are making will determine the kind of malt you should be using. Darker malts usually produce darker beers, and light malts…. well you get this idea. There is some debate about whether powdered or liquified malt is better, but for your beginner use, either will work just fine.
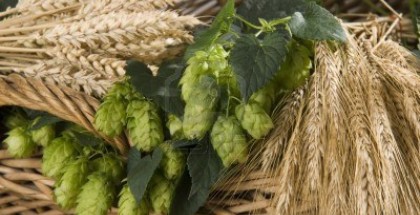
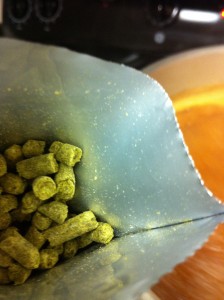 Hops – Hops can be misunderstood. There are a ton of varieties out there, all with different characteristics and flavors. Your kit will likely have one, maybe two, hops that you will use in your brew. We all have seen pictures of hops – the little, green cone-like flowers…but you won’t be seeing them in this state in a kit. You will likely see them in the form of pellets which look like rabbit food. Don’t be alarmed, though; this form is actually preferred among most home brewers. Hops make beer bitter through what is called Alpha Acid (AA). Calculations for International Bitteness Units are somewhat complicated, but put simply, the longer your hops are in the boil, the more bitter your beer will be. Put them in at the end, and you will retain more of the aroma and flavor of the hops. I will get into more on hops in a later article. Pellets are preferred by homebrewers because AA can spoil, and the pellets limit the amount of oxygen that can get to the AA, making them more “fresh”. They also dissolve more easily and won’t clog up your equipment as easily as hop petals, which are also available. HOPS MUST BE REFRIGERATED, SO DON’T LEAVE THEM OUT.
Water – Ever wonder why New York Pizza and Bagels taste different from the kind in your town? It’s all in the water. Some homebrewers will argue that high quality water is very important, but really, as long as you have a good public water source, you don’t need to get any special water. I use tap water because I know it’s filtered well. If you are iffy on this, you can use bottled spring water or filter your water at your home. However, I don’t think you will notice a significant difference between them. This is up to you.
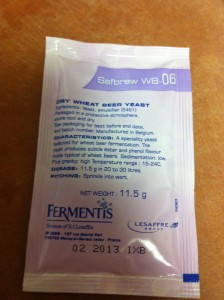
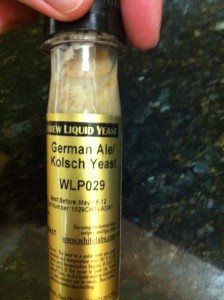 Yeast – Yeast has a long history in the course of human evolution. These little guys are what make beer beer. There are a lot of different varieties that have been developed, too. They are also responsible for a lot of the flavor in your beer. Some homebrewers use their own strain of yeast or keep their yeast alive from batch to batch using a yeast starter, but this is beyond your level as a beginner. Don’t try using bread yeast or instant yeast you picked up at the grocery store. These are made for other purposes (bread making), and they will not produce a good beer. Your homebrew kit will come with a yeast that is appropriate for your beer style – likely an ale yeast. Lager yeasts are a bit more complicated and have different requirements/needs, but I will cover that in a later article. Yeast can come in a liquid form that will come in a tube or in a dry powdered form. In either case, you will add your yeast to your beer last. AS WITH HOPS, YOUR YEAST MUST BE REFRIGERATED UNTIL USE.
Ok, so now you have gone to your homebrew store and picked up your ingredients , cleaned all of your equipment, and sanitized it like we described in part 1. Just to quickly recap, you need to clean all of your new equipment with PBW for 30 minutes, rinse, then soak it in Star San Sanitizer for five minutes. You are ready to brew!
While recipes will vary, you will likely boil some water – 2 to 3 gallons. You will want to do this in a pot that has extra room, so don’t brew in a pot that is filled to the brim with water; you will have a mess on your hands very quickl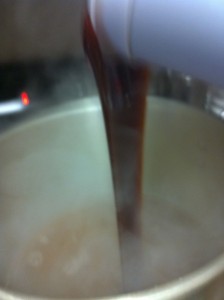 y. Once you have your water boiling you will add in your malt. Do this slowly, and stir it in until it is dissolved. If you let it settle on the bottom of the pot, it will burn, which will result in burnt flavored beer! No one wants that! Your recipe will dictate how long you will boil your brew, but it’s likely to be 60 minutes to 75 minutes.
Depending on your instructions and recipe, you are likely to add your hops next. Your recipe probably says ” add **Type 1** hops @60 minutes” or something similar. This simply means to add the stated style of hops (and amount- likely the whole package) into the boil for 60 minutes. If your recipe says you will be boiling the brew for 60 minutes and to add hops @60 minutes, you add the hops once your malt has dissolved. If it says @ 15 minutes, you would boil the malt for 45 minutes, then add the hops when 15 minutes remain, and so forth. Some recipes may call for you to add half the hops @ 60 and the remaining half @ 5. Follow the instructions.
After you add your hops, don’t put a lid on your beer. There are starches in there, and like a pot of pasta, it will overflow quickly if you put a lid on it. It may do this without a lid, so watch your boil! Your recipe may call for the addition of a spice or another ingredient. As long as you follow the directions, you will be fine.
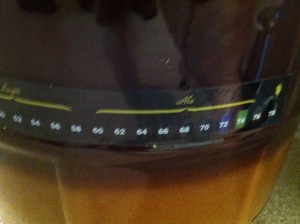 Once your boil is complete, you have what we call wort (prononuced wert). It is important that you chill your beer down from boiling temperatures to under 75 as quickly as possible. The longer this temperature change takes, the more risk you run of picking up funky flavors from natural yeast and other elements out of the air. There are lots of ways to accomplish this depending on your equipment, but for a beginner, you are best off loading your sink up with ice and water and setting your pot in it to cool it down.
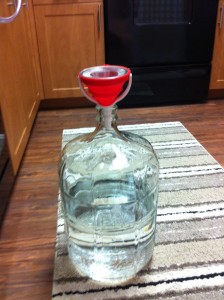
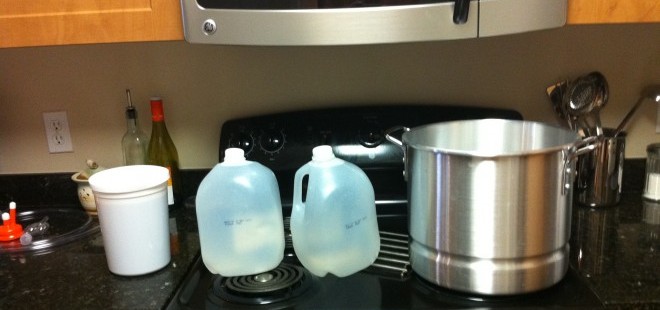
Since your boil only used 2 or 3 gallons of water, to complete your 5 gallon batch, you still need a few gallons, right? You can fill water jugs with water and chill them in the refrigerator while you brew so they are cold, and you can add this water into your wort or into your carboy/fermentor to help cool the wort down as well. Once your wort is sufficiently cool, put it into your carboy/fermentor. You will likely use a funnel (that you sanitized, right?) and a strainer to catch the remaining hops, which are likely a dissolved fibrous goo at this point. Once your 5 gallons are in your fermentor, and the overall wort temperature is under 75 degrees, and preferably under 72 degrees, you can pitch your yeast.
However, you will want to take a small sample before you pitch to measure the gravity 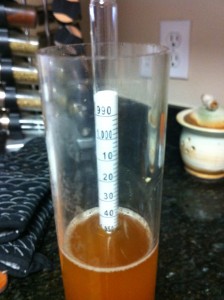 with your hydrometer. You will use this information later to determine alcohol content. Write down the hydrometer measurements and keep this information in a safe place. Just dump or sprinkle your yeast in, give it a good shake, and put your airlock on your fermentor to keep outside air out.
You should see your beer start to burp and produce CO2 within 12 hours. You should keep your fermentor in a cool and dark place; I cover mine up with a towel to keep light from reaching my beer.
You are on your way!
Up next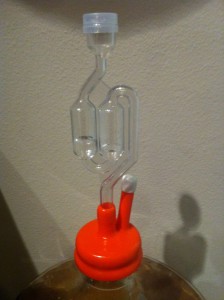 : The fermentation process.
Justin Hatfield is the founder of the Denver Draughters Homebrew club. You can join them here. He is also the founder of the Colorado Brewery Meetup.

Submit a Comment