


Homebrewing Recipe | House Porter

 Story by:
Scott Johnson
Story by:
Scott Johnson
Everybody needs a smooth, quenchable beer for any occasion no matter what time of year. Winter is a time for heavy, sweet bombs but not everyone can sit down next to the fireplace with a chalice every day of the week. Yet the temperature outside never slows down the innovation of the homebrewer. So as we trade in our lawnmower beers for snow-shoveling stouts, here’s drinkable porter that will warm you up in no time.
This “House Porter” came from a competition formed within my local homebrewing club. We’ve wanted people to participate in activities as a group and there’s no better way to get people brewing than putting skills to the test. Everyone has a unique process and setup, but you can create great beers nonetheless. I’ll be finding out next month to see how this does in our seasonal competition, but I’m more than pleased getting all this done in time for the chilly days ahead.
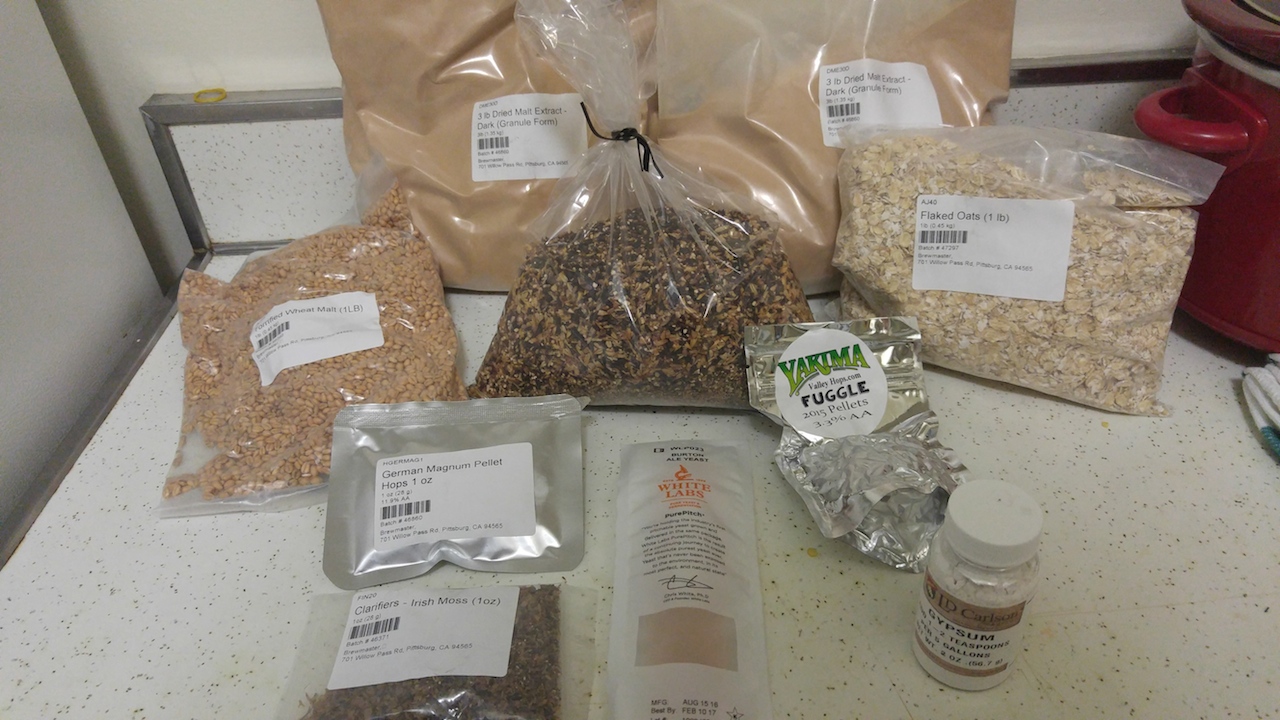
The Recipe
- 6 Lbs of Dark Dry Malt Extract (DME)
- 8 Oz of Crystal 40L Malt
- 8 Oz of Black Malt
- 8 Oz of Special Roast Malt
- 8 Oz of Flaked Oats
- 8 Oz of Torrified Wheat
- 2 Oz of Fuggle Hops (30 Minute Boil)
- 1 Oz of Hallertau Magnum Hops (60 Minute Boil)
- 1 Pkg of WLP023 Burton Ale Yeast
ABV: 5.7 | IBU: 34
OG: 1.061
I am a partial-mash brewer, meaning that I use malt extract as the bulk of my grain bill but still use hard, crushed grains for specialty flavors. This is helpful for anyone who wants to make the most out of a brewing starter kit as you can still get 5 gallons of a full-bodied beer out of a 3-gallon kettle. You’re slightly limited to how many styles and ingredients you can use, but you can still create amazing, one-of-a-kind beers on your own stovetop. These techniques might be unorthodox, but they have worked wonders for myself.
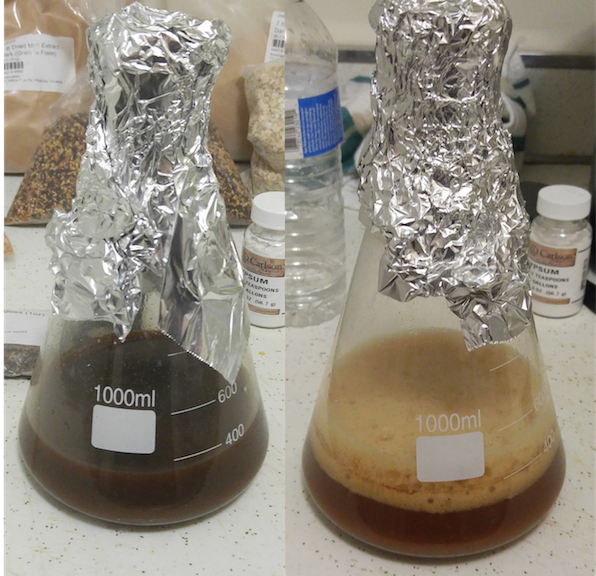
Before brewing, make a yeast starter the day before by boiling 1/4th Cup of DME with 2 Cups of Water. Heat the mixture to a rolling boil on medium for 10 minutes stirring constantly with a sanitized spoon. No matter what your set up is, keep a constant eye on your mixture to prevent boil-over. After the malt extract has been cooked, chill the pot in an ice-bath until your liquid reaches 80 degrees. Then slowly pour your pre-wort into a 1L or 2L Erlenmeyer Flask along with your yeast. Place a sanitized piece of aluminum foil over the top and store in a cool, dark place for 24 hours. (A stir plate will greatly help the process)
The first step is to get 2 ¾ Gallons of Distilled Water or Purified Water at 180 Degrees Fahrenheit. This water is not used for steeping the grains or bottling the wort, but actually for sparging; a technique to extract all the flavor out of the crushed grains by rinsing them with hot water. After the water hits the key temperature, carefully pour the hot water into your fermentation bucket. The water here will not only be used for batch sparging, but act as our top-off water, which is water added at the end of extract batches to balance out the intense wort brewed in a small kettle.
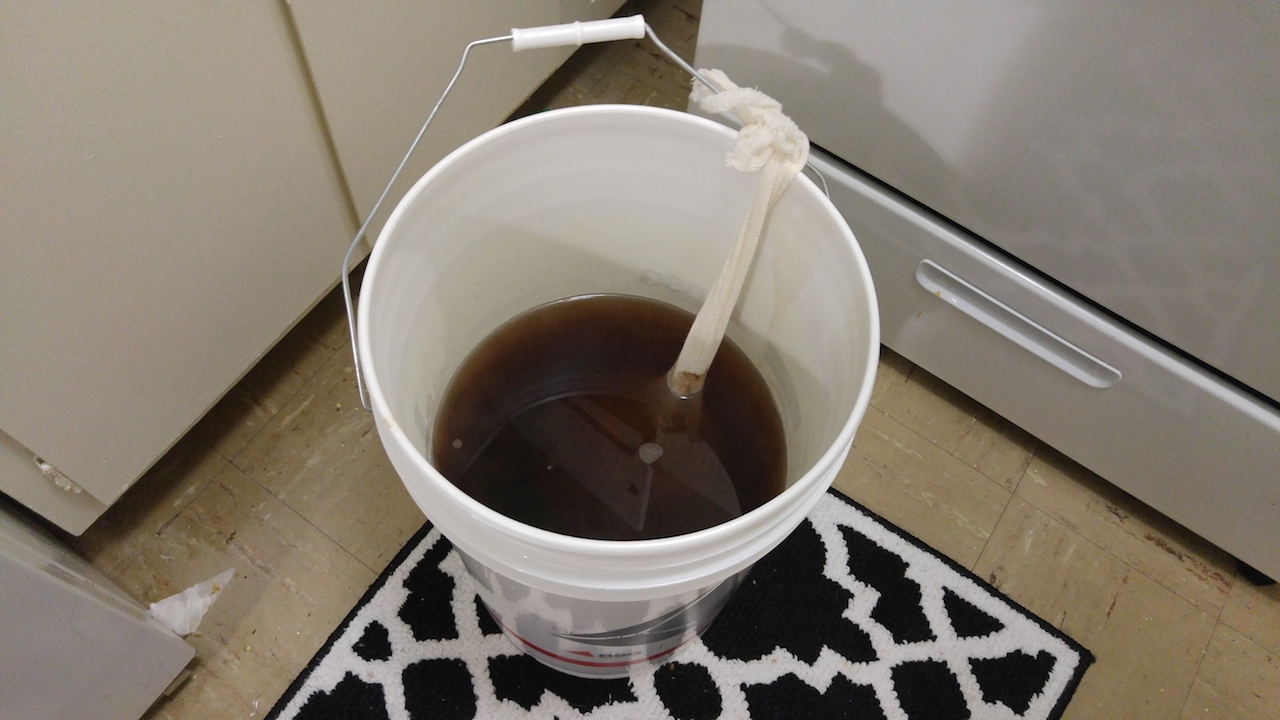
After this crucial step, we’ll be brewing like any normal stovetop brewer. Fill your kettle with 3 gallons of tap water and get the liquid to a temperature of 155 F. Add your mesh bag of specialty grains to steep for 60 minutes. After sixty minutes, turn the heat back onto your wort until the temperature reaches 169 degrees. Then remove the grain bag from your wort and put it into the bucket with the distilled water. Normally sparging is done for 20 minutes with hot water, but leaving the grains in this 130-140 degree water for an hour will extract the rest of the sugar out.

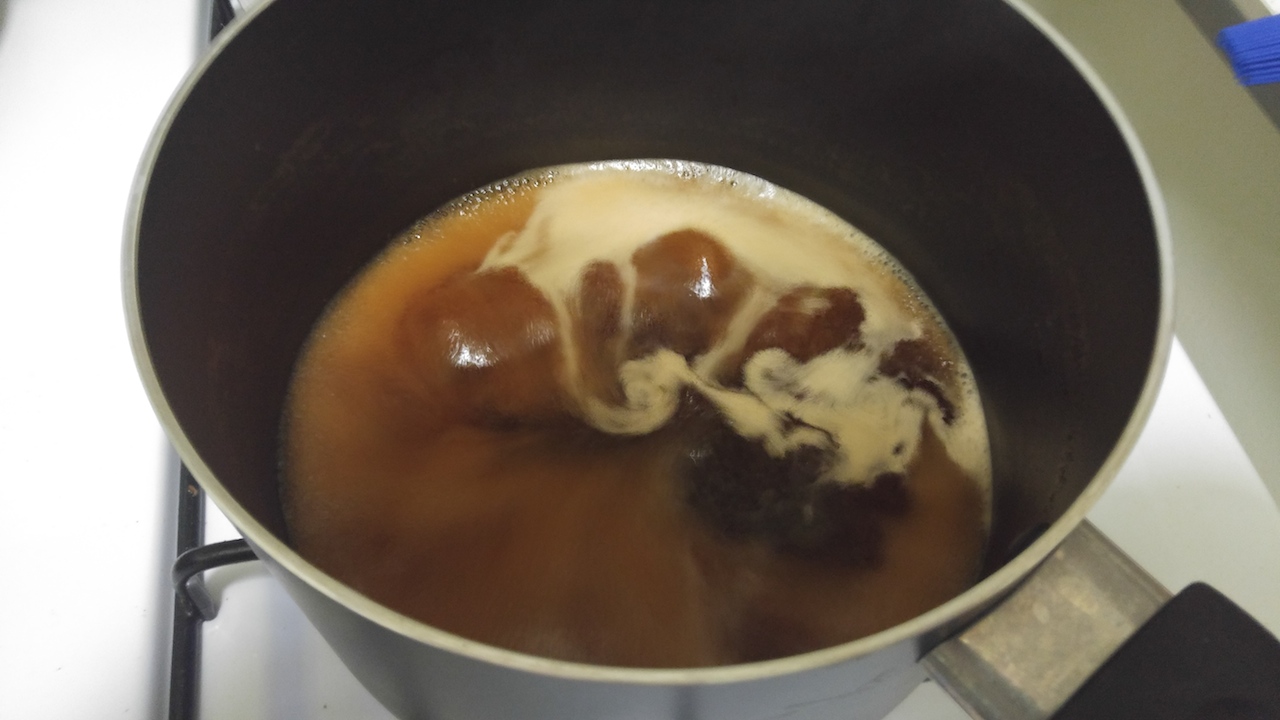
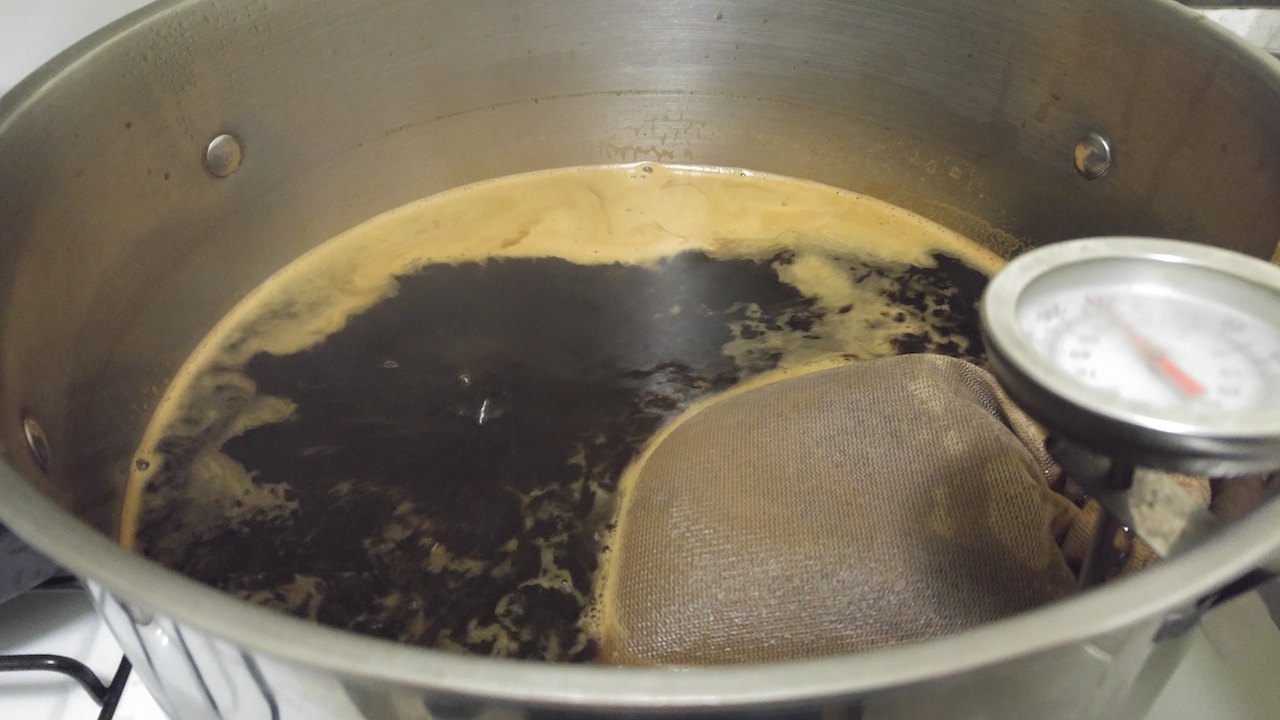
As your wort boils to 212 degrees, add in your malt extract in small batches stirring each time. Homebrewers debate whether to boil your extract for the traditional 15 minutes versus the full 60 minutes, but I prefer the later to guarantee the beer doesn’t have that distinct extract slickness. When your wort reaches a rolling boil of 212 degree, add 1 oz of Magnum Hops to your hop straining bag and place in the kettle.The bag as pictured below will start to expand when the pellets are exposed to water. Add 2 oz. of Fuggles at the 30 Minute Marker as your Magnum is halfway done.
Once your wort has boiled for the full 60 minutes, turn off the heat and move the kettle to your sink or your fermentation bucket for chilling. The total amount of liquid in your bucket should be around 5.5 gallons, but it’ll reduce down to 5 gallons after our steps of fermentation. Once the beer has chilled to 75-80 degrees (using a wort chiller or cooling the kettle down in an ice bath), add your yeast starter to the wort and set the beer aside to ferment for about 10 to 14 days. (Burton Ale Yeast looks for a fermentation temperature between 68-72 degrees)
Now if you can transfer your beer into a keg, great! But if you’re like me that still keeps beers in bottles, I recommend moving the beer into a secondary fermenter. I moved the porter into a glass carboy at this stage to finish the effects of the yeast and to give the beer more clarity. At this point, the beer had that distinct porter maltiness but was given a touch of dark fruity skin and sweet pear notes. Leave your beer in secondary for another two weeks, and then transfer the beer into bottles after mixing in 1/3 cup of priming sugar (corn sugar) diluted in 1 cup of heated water.
The Result
“House Porter” pours super dark and opaque. The head is filled with creamy brown, tightly packed bubbles that dissipate really quickly. The aroma reminds me of extra crusty raisin bread, permeating with dabs of vanilla and almond extract. I get an enticing smell of sugarplums and other various dark fruits just as the holiday season promotes.
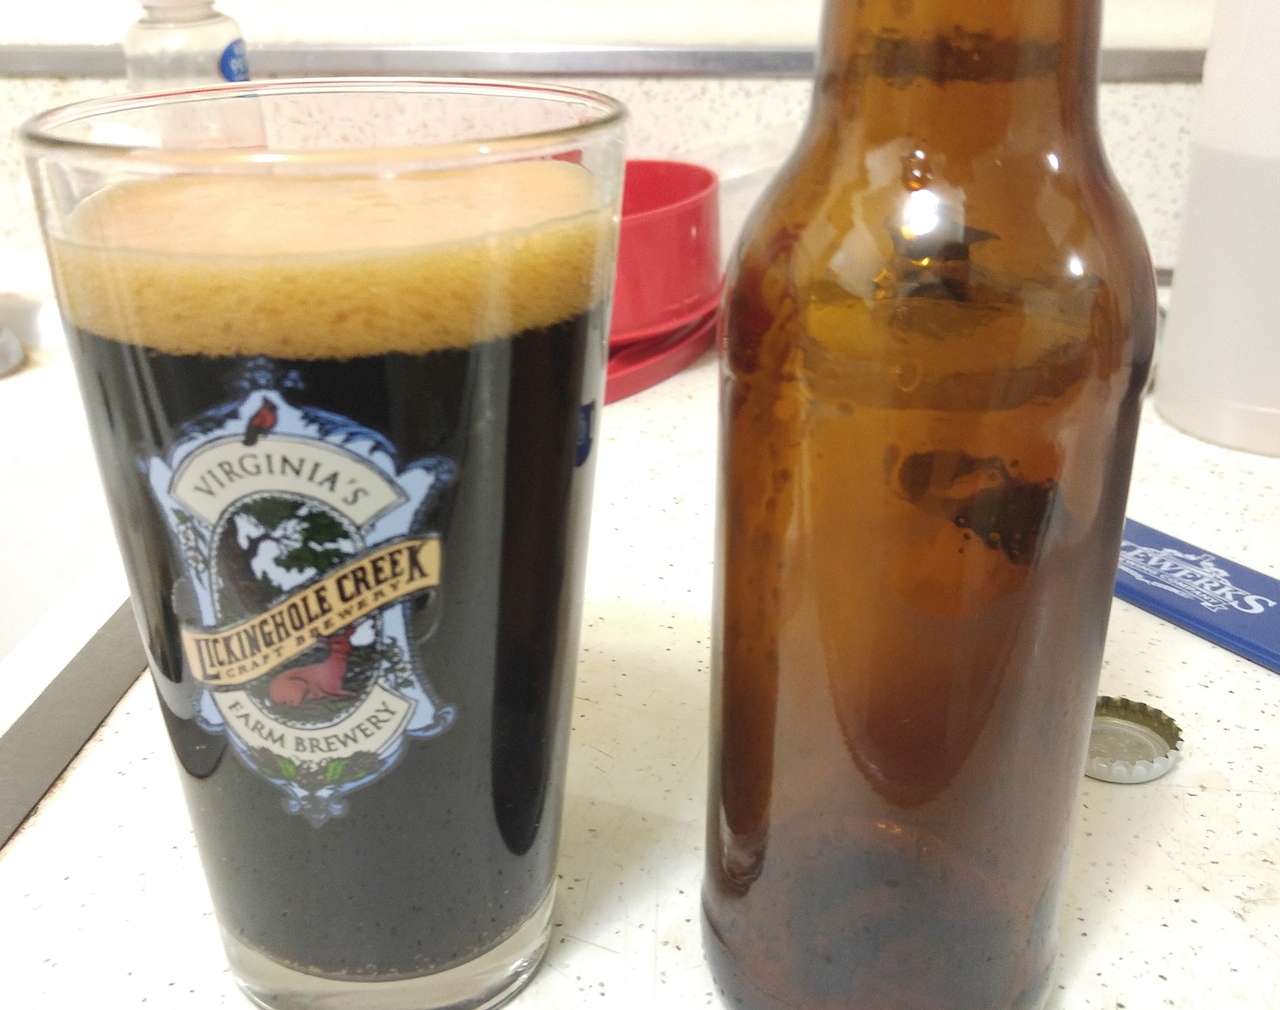
The beer has an unmistakably rich, dark malt flavor like the bricks in a fireplace. Flavors match the fruit cake smell with notes of dark fruits and tannic skin of dried berries. There’s a light tartness coming through due to Special Roast malt, giving a distinct flavor of salty licorice. Depending on when the beer is served, you’ll get more of the classic, roasty malt, burnt-toffee flavors when cold but more salty caramel when room temperature.
“House Porter” is a lovely beer to have around the house to accompany rich, decadent meals and nights easing out on the couch. Having five gallons of this beer at home will keep me stocked throughout the holidays and extending into the cold months of 2017. I don’t know how this’ll do at my in-house competition but I already feel like a winner.
[mc4wp_form]


Comments 0
No Readers' Pick yet.