


Homebrewing Recipe | Emerald Splash Cucumber Lime Saison
 Story by:
Scott Johnson
Story by:
Scott Johnson
ABV: 6.1 | IBU: 28 | OG: 1.057
When I was a greenhorn to the craft beer scene; I became the guy at beer shares who would bring accouterments in the form of fancy cheeses and cucumber/lime water. The flavored water ultimately served as the ultimate palate cleanser for event guests seeking to brush their weary tongues after too many barleywines and imperial stouts. Some people would even tell me they would come to a beer share or my homebrew club hearing cucumber/lime water would be there. Emerald Splash Cucumber Lime Saison is the result of people asking me to elevate that beverage to the next level.
The recipe for my cucumber/lime water was simple. Add ½ of pre-sliced seedless cucumber (the kind wrapped in plastic at the market) and ½ a lime of juice and zest to 3 liters of water to ensure beer share success! To brew a beer based on this recipe, that would be more involved.
My mind immediately went to Berliner weiss or gose for the drinkability, but I ultimately chose Saison because the natural bitter flavors work well with the yeast. I’ll cover goses one day, but this lively treat will be refreshing when the snowy fields transform to dewy grass.
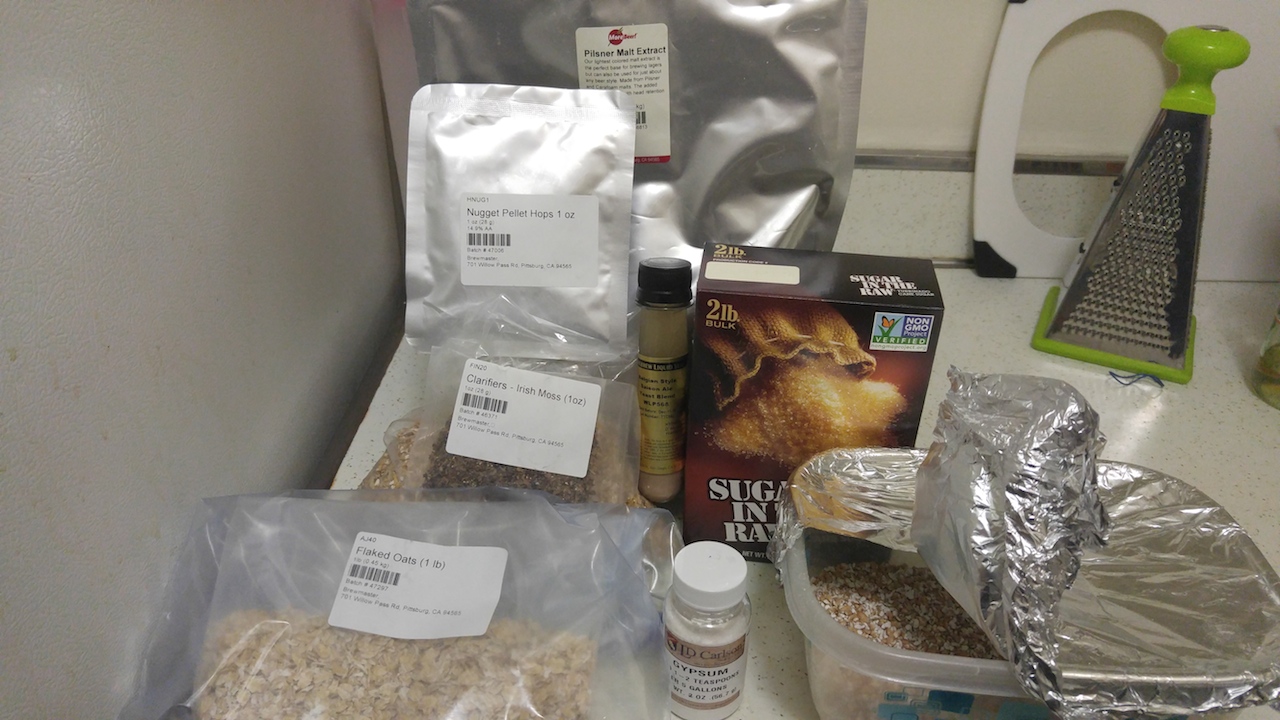
The Recipe
- 6lb Pilsner liquid malt extract
- 1 lb Vienna malt
- 8 oz Turbinado sugar
- 8 oz flaked oats
- 8 oz torrified wheat
- 10 g gypsum (to fortify the water)
- ¼ tsp Irish moss
- 1 oz Nugget hops (60 Minute Boil)
- 1 pkg of WLP568 – Belgian style Saison ale yeast blend
- 1 14 oz bag frozen lime pulp (for secondary)
- 2 seedless, English cucumbers (for secondary)
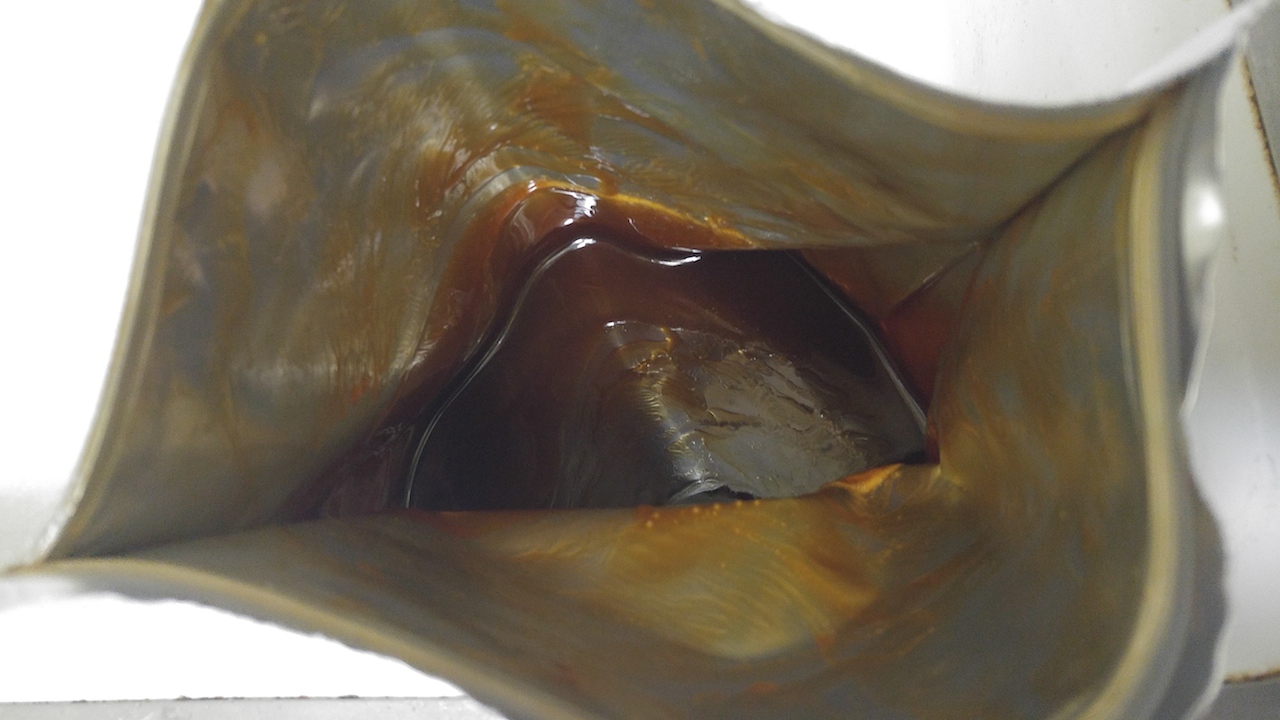
As a partial-mash brewer, this recipe will follow the same instructions as done in my previous House Porter recipe. The only noticeable difference in this brewing method is the use of liquid malt extract (LME). The LME can be tricky to incorporate in the batch and may require mixing with hot wort to get all of the malt in there.
In addition, I used this pilsner malt extract by MoreBeer.com, which has traces of CaraPils in the bag. The color was a lot darker than I had expected and may be around 5-6 SRM if you were to substitute with dry malt extract (DME) or whole grains instead.
The first step is to get 2 ¾ gallons of distilled water or purified water at 180° Fahrenheit. This water is used specifically for batch sparging to extract all the flavor from the spent grains. After the water hits the key temperature, carefully pour the hot water into your fermentation bucket.
The water here will work double as our top-off water that is added at the end of extract batches to balance out the strong wort brewed in a small kettle. Make a starter for the yeast the day before brewing and prep for tomorrow!
Next, we’ll follow the steps like the normal stovetop brewer.
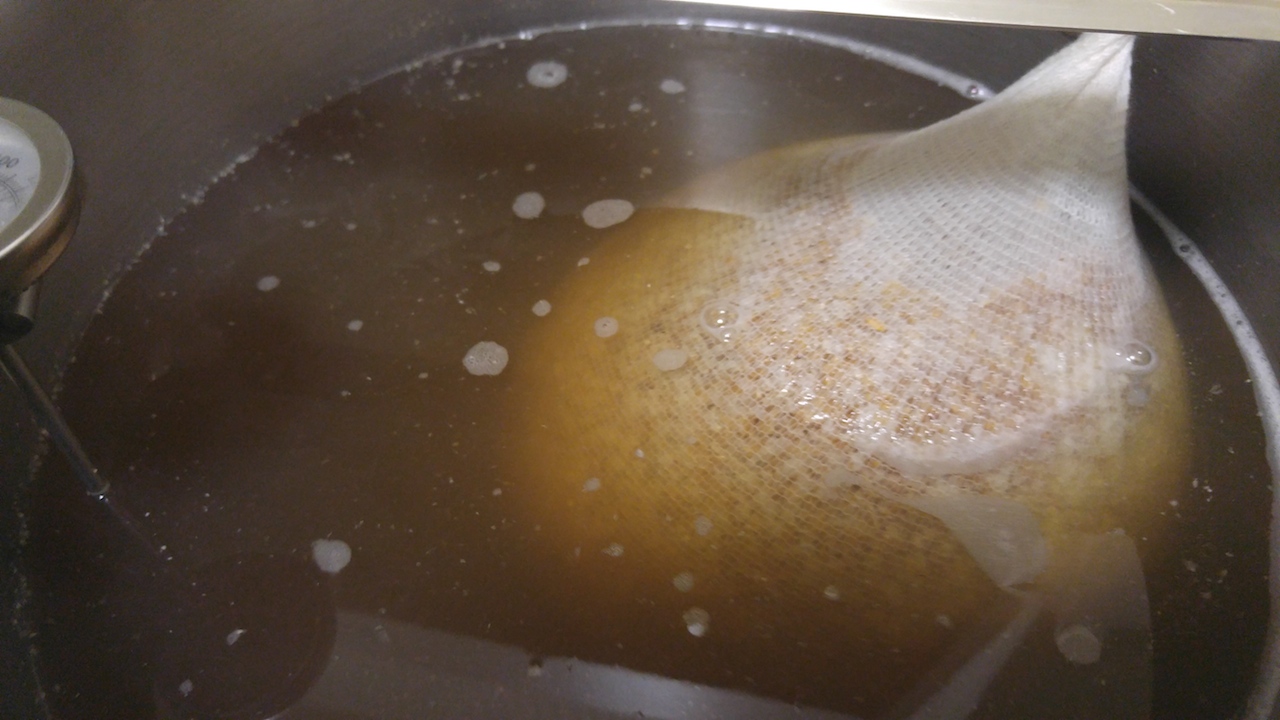
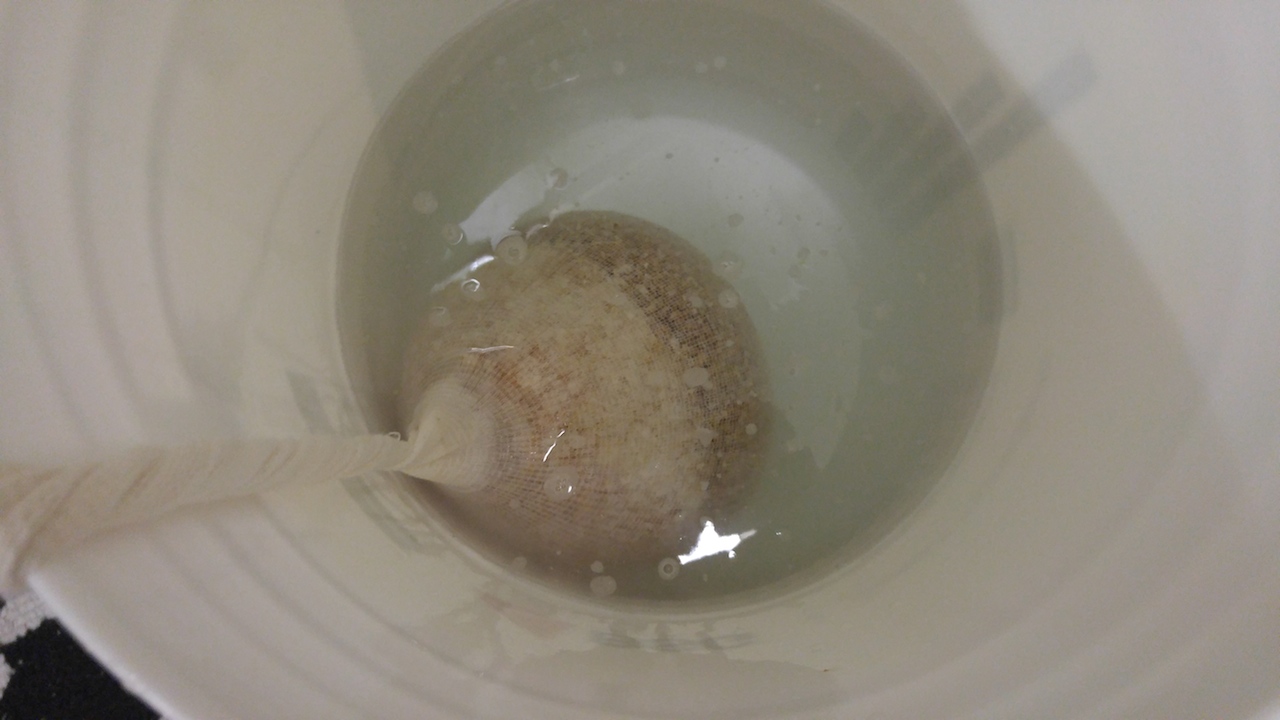
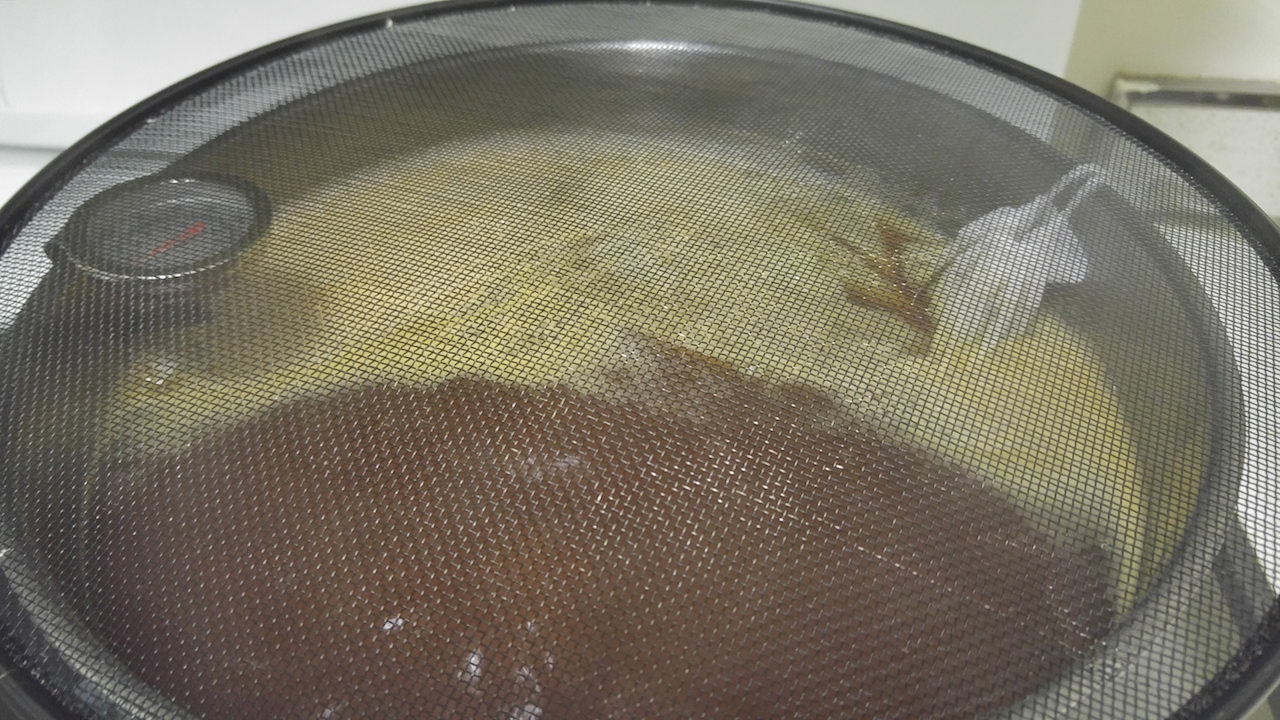
Fill your kettle with 3 gallons of tap water and get the liquid to a temperature of 155°F. Add your mesh bag of specialty grains to steep for 60 minutes. After 60 minutes, crank up the heat until your wort reaches a temperature of 169°. Then, remove the grain bag from your wort and put it into the bucket with the distilled water (the torrified wheat will make it look and feel like a gelatinous oatmeal). Regular sparging is done for 20 minutes with hot water but we will leave our grains in the 130°-140°F water for an hour.
As your wort heats to 212°F, add in your malt extract in small batches stirring each time until the bag is empty. At boil, add in 1 oz. of Nugget hops in your hop bag. Nugget hops have a lovely mild, herbal character that compliments Saisons wonderfully.
After 15 minutes of boiling, add your gypsum to the wort (or not, if your water has the right minerals). Fifteen minutes before the boil ends, add your Turbinado sugar around the same time you would add Irish moss.
Once your wort has boiled for the full 60 minutes, turn off the heat and move your kettle to the sink. Using a water chiller or ice bath, cool down your mixture to around 75°-80°F. Then, add the cooled wort into your top-off/sparge water and continue to cool as necessary.
The combined water should reach that same temperature. I decided to use the White Labs 568 Saison blend yeast to get both the earthy, dry finish and peppery, spicy flavors at a reasonable attenuation rate. Saisons ferment at high temperatures (70° to 80°F) so it’s preferable to keep the fermentation vessel in a warmer room. Ferment for three weeks before transferring to secondary.
The Secondary Struggle
Composing the base for Emerald Splash was relatively easy, but finding out the best way to work in the key ingredients was a whole other matter. There’s so much debate in the homebrew community as the best way to deliver a unique, funky flavor to a beer depending on the variety.
For the lime, I originally wanted to make a tincture made from lime zest and vodka. Unfortunately, after three weeks, the tincture had a noxious taste of nail polish remover that was unworthy of use.
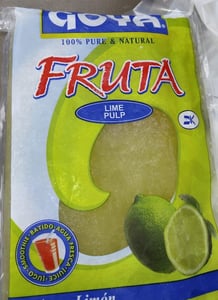
I found salvation at my ethnic food market by finding Frozen Goya Fruit Pulp (commonly used in Aqua Frescas). The only ingredient in the bag is lime pulp and it would be easy to transfer into the carboy without any of the same risks as the tincture. A 14 oz. bag was all I needed for the 5-gallon batch but I could see anyone using multiple bags of this product if they wanted to create a really fruity beer of their choice.
This was an especially good find because the frozen fruit pulp comes in several tropical flavors like passion fruit and mango; that’ll be excellent for later beers. I added my lime pulp a week before bottling to ensure I’d get that acidic pop.
Cucumber adds an extra layer of difficulty because in order keep the refreshing taste, you can’t cook it or drastically transform it. So adding the cucumber came with a hope and a prayer.
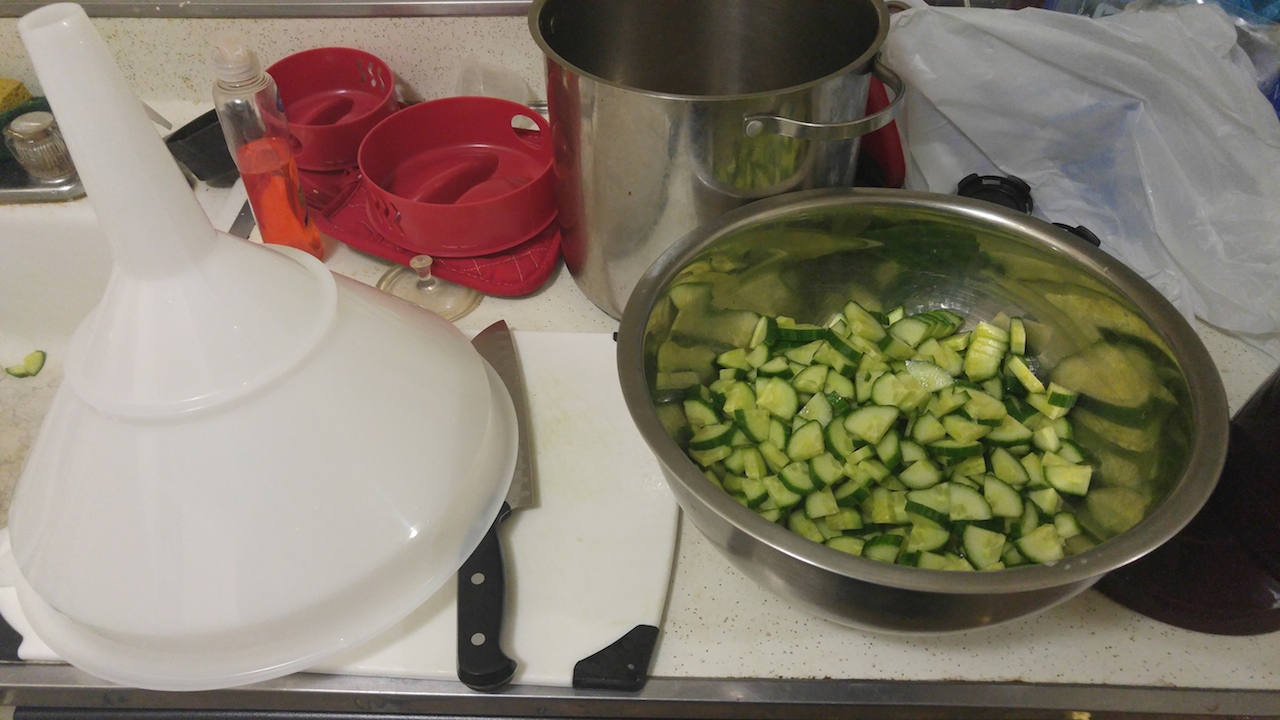
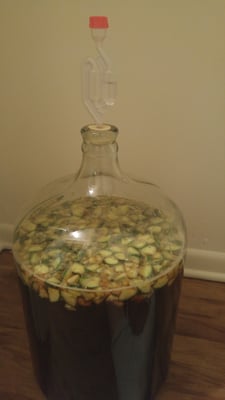
I don’t know how large breweries do it, but I had to be very conscientious about time considering the freshness of the cucumber would stay in the more acid PH of wort. So I put in 3 chopped, sanitized, and rinsed seedless cucumbers into my carboy using an especially large funnel. Other homebrewers suggested having the cucumber in secondary for a max of 4 days, but I had noticeable results within 36 hours. Once you feel the cucumber is properly infused, immediately bottle your beer using 2oz. of priming sugar or by kegging.
The cucumber flavor in this beer can be overwhelming to some people, so I recommend reducing it to 2 cucumbers for only 24 hours. The picture below was taken after I got the cucumber into the carboy. I recommend cutting the cucumber into matchsticks or eighths because some of my quarter-moons would get stuck in my funnel. Depending on which flavor you prefer you can tweak the ratios of these secondary add-ons.
The Result
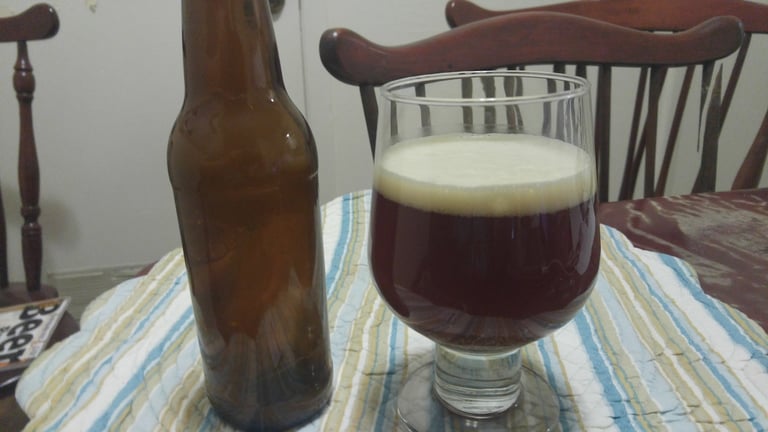
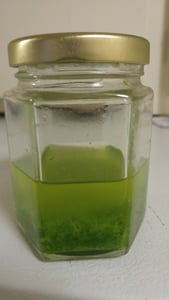
Emerald Splash has a gorgeous, moderately hazy copper body with a silky head that hugs against the glass. The aroma is dominated by cucumber flesh, featuring touches of lime pith and a spicy undercurrent of yeasty phenols. Despite the strength of the secondary ingredients, I can still detect a solid base that has the beefiness comparable to rye Saison but without the sharp graininess. There’s also a mild lactic note that carries a smell like flatbreads served with tzatziki, olive oil, and freshly cracked pepper.

This Saison could be defined as a herb/vegetable beer because cucumber skin is the primary flavor. Emerald Splash has a unique, tangy punch assisted from the sharpness of the lime pulp to cut through the bitterness. It’s heavier than the typical Belgian Saison but the cucumber gives it a more aqueous taste making it easier to drink than the 6.1% ABV suggests. The turbinado sugar gave the right amount of dry sweetness so that it is substantial in every drop. If the cucumber taste is still too strong for anyone, let the beer air out for 15 minutes so the Saison base is more prominent.
Cucumber beers are a hard sell to just about anyone; using them as a homebrewer truly makes you feel like a mad scientist. Still, I recommend this beer if you love all those flavors with a passion or like to experiment with new things. Either way, when you discover a beer like this I’m sure your mouth will burst with freshness! (Images Below by David Production)
[mc4wp_form]


What was the reason for going for such a dark beer with such light springy flavors?
Kyle,
The beer turned out much darker than my calculations because the liquid malt extract itself had dark caramel color. Some partial mash brewers debate when you should add extract into your wort as it boils, but I prefer to do it for the full 60 minutes so it eliminates any “extract-y” flavors. So by boiling it for that long, the extract could have caramelized for a darker color. This was just a miscalculation from Beersmith but it still has that Saison flavor.
If you were to use Pilsen Dry Malt Extract that color would be more like I intended around 5-6 SRM. The beer does fit in the BJCP definition of a Saison which goes between 5 to 14 SRM. The saison looks dark in the photo because of the light and amount in the glass. The most popular Saisons are light gold to coppery, but can be made with darker malts for a more unique flavor.