


Homebrewing Recipe | The Homebrewer’s Spice Rack (Inspired by Scratch Brewing)
 Story by:
Scott Johnson
Story by:
Scott Johnson
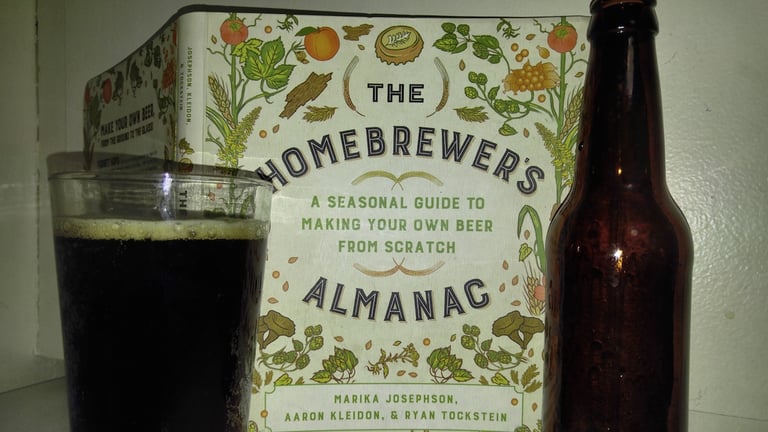
The adventurous spirit of the brewer gives life to the craft beer industry. From humble beginnings creating experimental homebrews to large scale operations, the way styles and ingredients revolutionize our palates is nothing short of incredible. That’s what gave me a real appreciation for Scratch Brewing Company whose philosophy of forage-to-keg brewing really tests what beer is capable of. I had to own their book “The Homebrewer’s Almanac: A Seasonal Guide to Making Your Own Beer From Scratch” after our fellow PorchDrinking writer David Nilsen covered it in loving detail.
(Read: Book Review & Interview | The Homebrewer’s Almanac)
My first exposure to Scratch Brewing came from an episode of The Beerists Podcast where they talked about beers brewed with tree bark, mushrooms, and some without hops at all. Marika Josephson and Aaron Kledion are true pioneers going beyond the potential of wild yeast to brew with everything (and I mean everything) local to Southern Illinois. I can relate to that desire of experimentation, making a cucumber and lime saison.
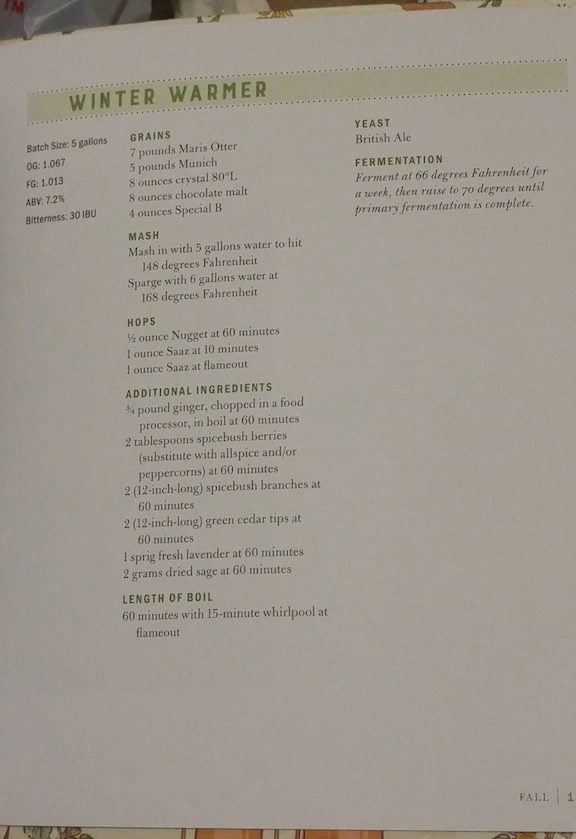
The book goes into loving detail over how every ingredient can be used to it’s fullest potential that I had to brew a recipe. My interest landed on their Winter Warmer recipe, as ginger is one of the world’s most fascinating, versatile ingredients. It already works in unorthodox styles like pale ales and barleywines so this was sure to be a winner.
From now on, my recipes will be tuned to a Brew in a Bag (BIAB) setup replacing my old extract system. Brew in a Bag offers a better array of ingredients to use without the hassle of extra storage for mash tuns or the use of propane burners. This comes at the cost of requiring more malt for a better extraction rate but I can say this is the best option for brewing indoors. The recipe from the book actually converted to my setup quite well and there are extract recipes included if you still have that system.
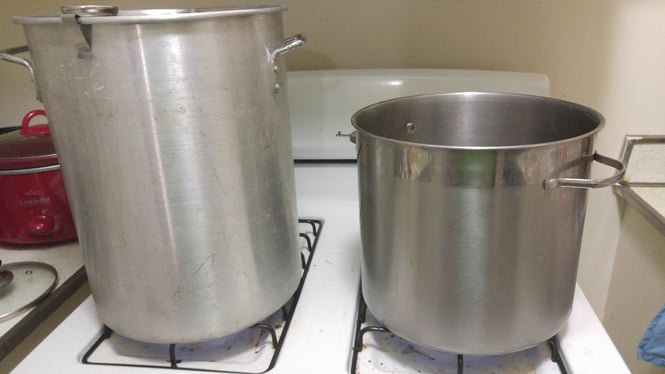
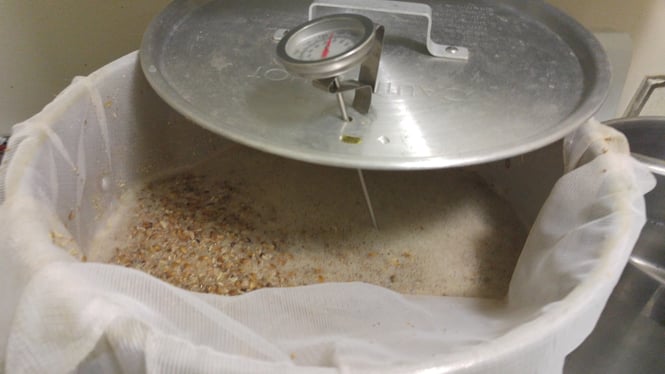
In my 6-gallon pot, I heat 4 gallons of water to 148 degrees. This is the strike water that will be used to extract the sugars from the crushed grains. I would then line the pot gently with a nylon mesh bag that will not burn because the temperature will stay low or off for most of the mash. As you scoop the grains into the pot, mix every single time so clumps do not form. Turn the burner off once your mash gets back to 148 degrees and cover.
Around this time, you have to keep your eye on the temperature for the full 60 minutes. If it starts dipping below 145, turn the heat back on. Don’t let the mash get too hot (above 158 is the danger zone) during this stage or else you might get some more tannic, husky notes that may be unpleasant to taste. Remove the lid and stir every 10 minutes so they grains can be evenly distributed.
After 60 minutes, turn the heat back onto your large part until it reaches 168 degrees. We are entering the sparge stage to get every last bit of flavors from the grains. In your smaller pot, heat two gallons of water to the same temperature just to have it ready on stand by. After both of your kettles reach peak temperature, remove them from the heat.
Carefully transfer your grains from the big kettle to the small kettle and mix with your spoon/paddle. I personally put the bag into the small kettle and slowly lift from a corner until the bag’s contents are empty. Next, take a sanitized colander and pour the grains ontop of the container in batches until you stop hearing water dripping. Repeat this process until your small kettle is empty of liquid and grains. Dispose of your grains and put your new wort back onto the kettle to boil.
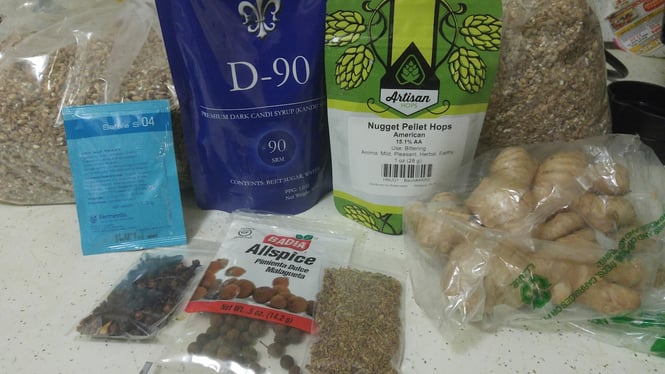
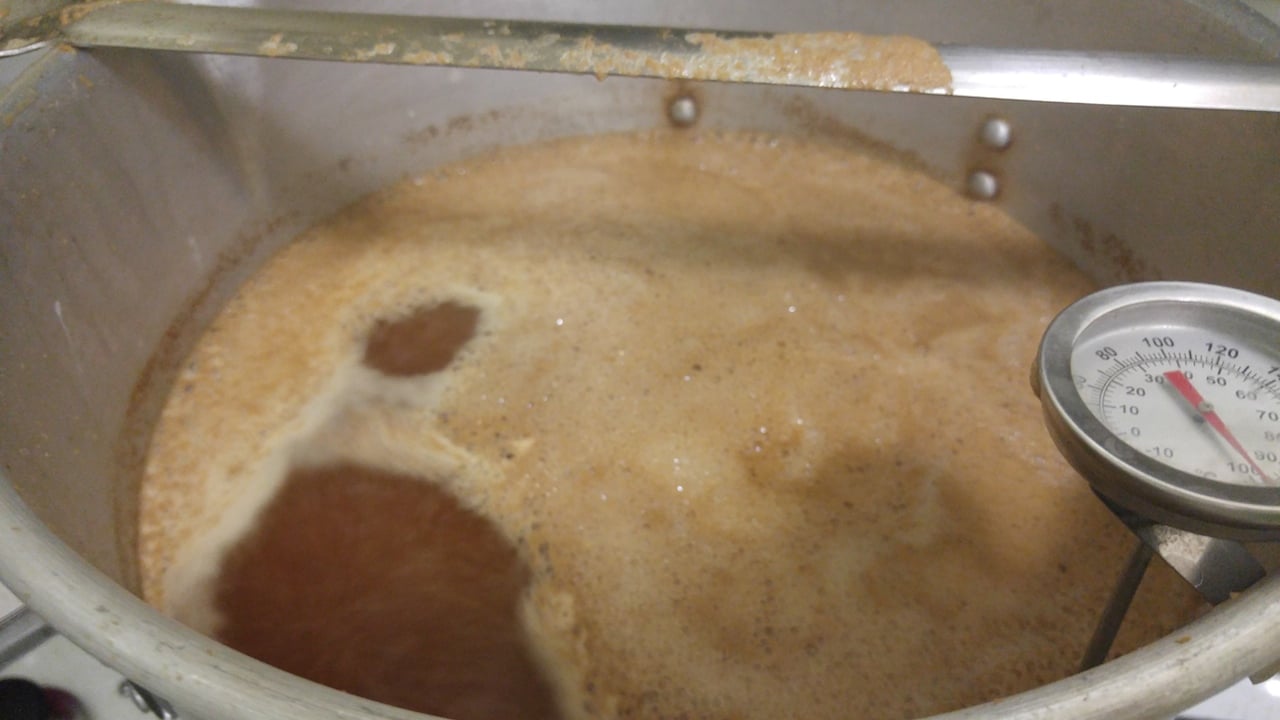
I consider boiling to be the easiest part of the brewing process. Heat your wort until it reaches a rolling boil at 212 and then get started on adding your hops. Nugget is a very strong bittering hop so boiling for the full 60 minutes will give you all the herbal flavor necessary. I added the candi syrup around this stage as well while stirring so none of it would burn at the bottom. Add your chemicals at the necessary times (Gypsum, Calcium Chloride, Whirfloc) and just let it rock.
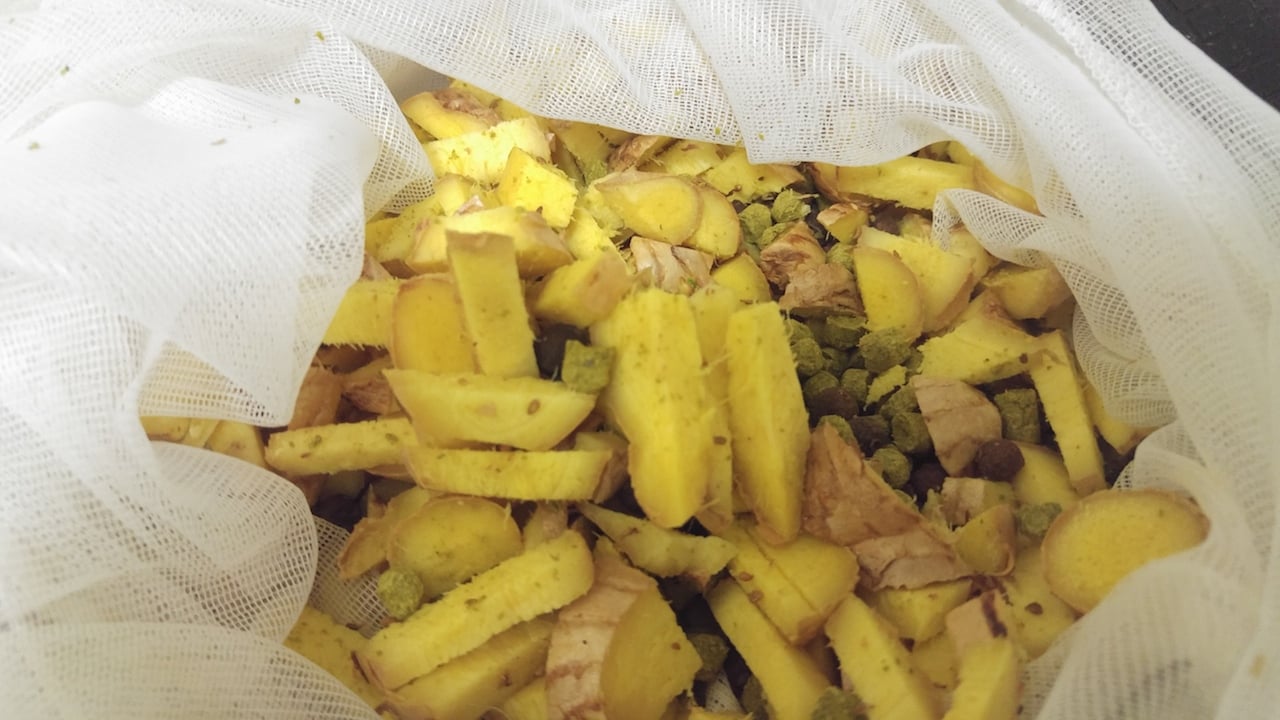
What’s fascinating about Scratch’s Winter Warmer recipe is how the ginger is boiled for the full 60 minutes using such a large quantity. Other brewers I would show the recipe to were visibly worried at the sheer volume of ginger root. Beersmith recommends adding the ginger 12 minutes before the boil ends, using only a 2-inch thumb sized amount. Following the book’s instructions for ginger gave my apartment the lovely smell of ginger snap cookies. However, tasting the wort after it was done boiling reminded me so much of Vietnamese Pho. (Likely brought on by the other spices used)
For a long time I went with just an ice bath to cool down my wort; buying a wort chiller has changed my brewing life significantly for the better. Add your wort chiller to sanitize 15 minutes before the boil ends. Once the boil has ended, remove your hops and transfer your kettle to the sink. Be sure to stir the wort as your hooked up chiller is running the water to accelerate the cooling process. Transfer the wort to your fermenter, add your English yeast, and store away to bubble.
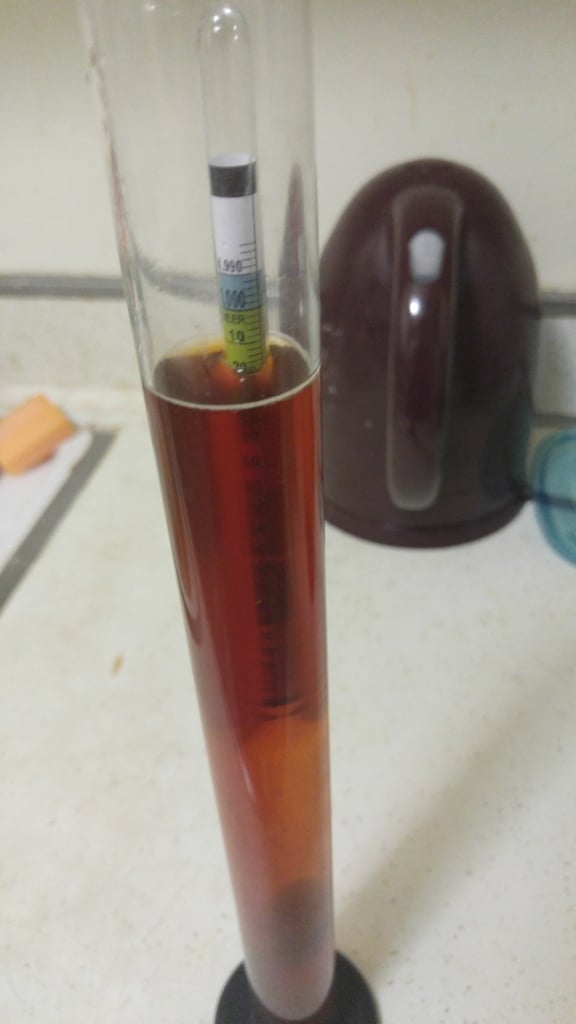
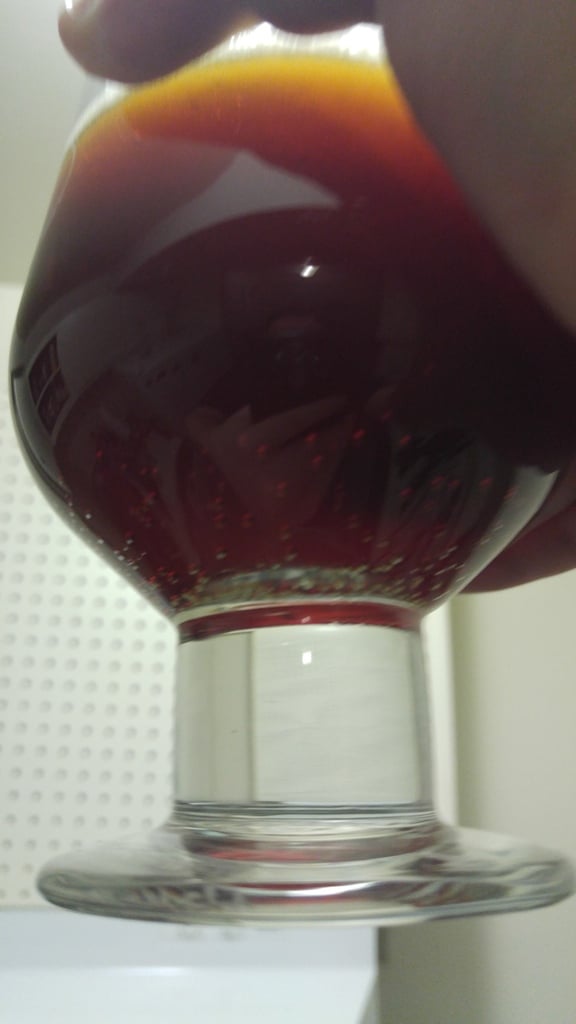
The Homebrewer’s Spice Rack, as I have christened, pours as tawny brown color with ruby highlights. The head is effervescent with several bubbles running against the sides of the glass. Unsurprisingly, ginger takes front in center from the first smell an undercurrent of spicy malts. So many notes ranging from the woody allspice and herbal hops run the gamut through your senses.
Scratch put this recipe into The Homebrewer’s Almanac for a reason because it is one sure-fire winner. This beer is liquid gingerbread giving you the smooth taste of sweet, warm spices from beginning to end. I really liked the cola edge that candi syrup gave to beer as well, giving you that zippy aftertaste of craft soda. In retrospect, I would leave them out the clove and anise I added, as they were overkill to the already licorice-y taste present in the beer.
I highly recommend you make this recipe as Scratch has laid it out. My main mistake came from trying to add more to something that was already perfected. Learn from this! They provided me a great beer and wealth of knowledge beyond my surroundings. So if you want to discover the next great flavor experience, I implore you to check out their book and homebrew like the best of them.
[mc4wp_form]


Comments 0
No Readers' Pick yet.